Food

Unicorn Hot Chocolate at Creme & Sugar

Unicorn Hot Chocolate at Creme & Sugar

We live in a town in north Orange County where there’s a cute little coffee shop called Creme & Sugar. It’s fairly new and has been popular locally but never very crowded. A few months ago they introduced some new “secret” items. One of them is Unicorn Hot Chocolate.

Unicorn Hot Chocolate at Creme & Sugar

It’s pink hot chocolate overflowing in a huge mug, topped with whipped cream, colorful candies and sprinkles, and pastel colored marshmallows. It looks like my daughter’s wildest hot chocolate fantasy come true! They carry several other unicorn-themed items including Unicorn Bark…

Unicorn Bark at Creme & Sugar

…and Unicorn Cake.

Unicorn Cake at Creme & Sugar

Videos about the Unicorn Hot Chocolate have gone viral and this quiet coffee shop in our small suburb town has turned into a popular hot spot for people near and far. Lines, that used to be short or non-existent, can be very long if one’s visit isn’t timed right. I’ve heard of people waiting over an hour to place an order, and up to 45 minutes to receive their order. Locals aren’t thrilled about the lines at their favorite formerly quiet coffee shop, but we’re happy for Creme & Sugar’s success! I saw this sign inside the store.

Unicorn Hot Chocolate Wait Time

Nolan and I were on our way home from an errand one weekday morning and, since we hadn’t had the Unicorn Hot Chocolate experience yet, I decided to swing by to see if there was a line. We got lucky! No line! Woot woot! So we headed inside to see what the excitement was about.

Outside Creme & Sugar

We ordered our Unicorn Hot Chocolate at the counter.

Creme & Sugar Counter

Then we waited for a bit. We didn’t wait that long. Mr. Personality was just anxious to get his hot chocolate.

Waiting for Unicorn Hot Chocolate

When it was finally ready, we were presented with a frothy, overflowing mug of pink and white fluffy sprinkle-covered yummies! I had to hold Nolan back so I could take a photo.

Unicorn Hot Chocolate at Creme & Sugar

My boy dove right in.

Unicorn Hot Chocolate at Creme & Sugar

Unicorn Hot Chocolate at Creme & Sugar

He loved the marshmallows and ate every one of them. Then he decided was done and it was my turn. I won’t comment on the taste of the hot chocolate, but I will say that I told my pregnant neighbor that she should drink a Unicorn Hot Chocolate if she wants a preview of how she’ll feel after her glucose test in a few weeks.

It’s very pink. And very sweet.

Unicorn Hot Chocolate at Creme & Sugar

Creme & Sugar serves many other drinks. They also have ice cream and an assortment of baked goods.

Creme & Sugar Menus

Ice Cream at Creme & Sugar

Creme & Sugar Lounge Area

If you want to give your kids a cute, fun, colorful hot chocolate experience, you need to get them a Unicorn Hot Chocolate. I loved seeing Nolan’s face light up when the big mug of overflowing fluffy yummies was served to us. Considering he only ate the marshmallows and my taste buds and stomach could only handle a few sips, I felt like the $6.75 price tag was a bit steep. But it was one of those things that we had to experience once so we could say we did it. And I’m glad we did.

No Comments
Favorite Things

Kinder Joy Eggs

My kids LOVE Kinder Eggs. Heck, I do too! When I went to college in England, I bought them all the time and had a big collection of the awesome toys that are hidden inside. They were hard to find in the United States, but could be purchased at British shops and other stores that sold foreign foods. Then someone decided they were unsafe and they became illegal in the United States. BOO!

Sometimes brave people, like my mom, sneak them into the US. Here’s a contraband egg my mom brought me from Wales earlier this year.

Kinder Egg

Kinder has created a new egg that’s legal in the US and still has all of the awesomeness of the original eggs. They’re called Kinder Joy Eggs. I didn’t know about them, but while browsing a new local grocery store, Harvest Fresh Farmers Market, I unexpectedly found them! They were a bit pricey, but I knew the kids would be crazy for them, so I got one for each kiddo. The egg splits into two, and each side is covered and sealed with plastic. One side contains some yummy Nutella-like deliciousness with 2 chocolate balls in it, and the other side contains a super awesome Kinder toy that’s just like the toys in the original eggs.

My kids, being little budding YouTube stars, demanded that I make a video of them opening their eggs. So here it is. (Click Continue Reading for the video if you can’t see it.) Thanks, Kinder! We’re loving the new, legal eggs!

No Comments
DIY

How To Make Cute, Personalized Thank You Notes

How To Make Cute, Personalized Thank You Notes by Life As A Mama

Christmas is over, gifts have been opened and played with, and it’s time to send thank you notes. I think thank you notes are very important and try to make sure one is sent when we receive gifts. My kids are 3 and 6…not quite old enough to write notes themselves yet. My daughter, the 6 year old, could actually probably write them herself, but it would take hours and I would have to sit with her and tell her how to spell everything and we would both get frustrated so, until she’s able to do it herself (maybe next year when she’s in 1st grade), I’m the thank you note writer. Sometimes she dictates the thank you notes to me, which works well for us until she gets sidetracked by something else. She’s 6…her attention span is short.

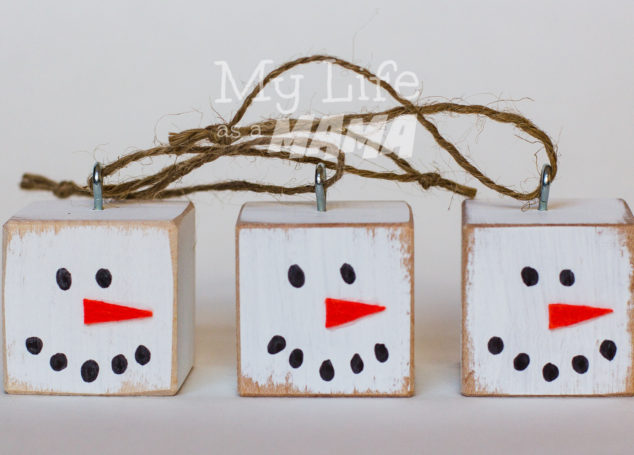
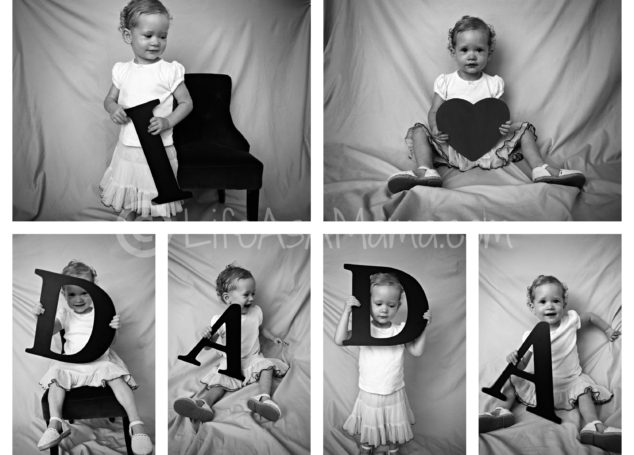
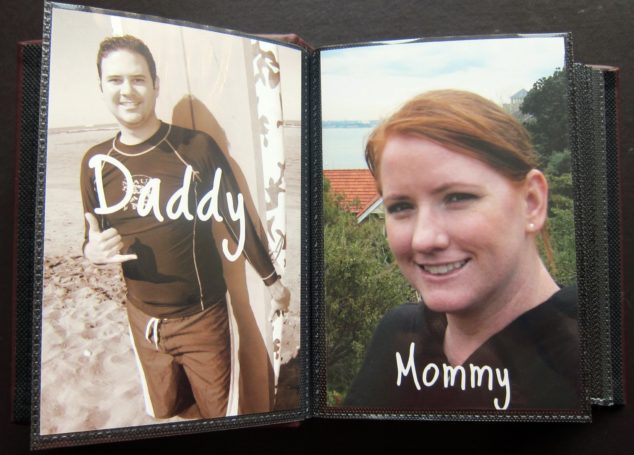
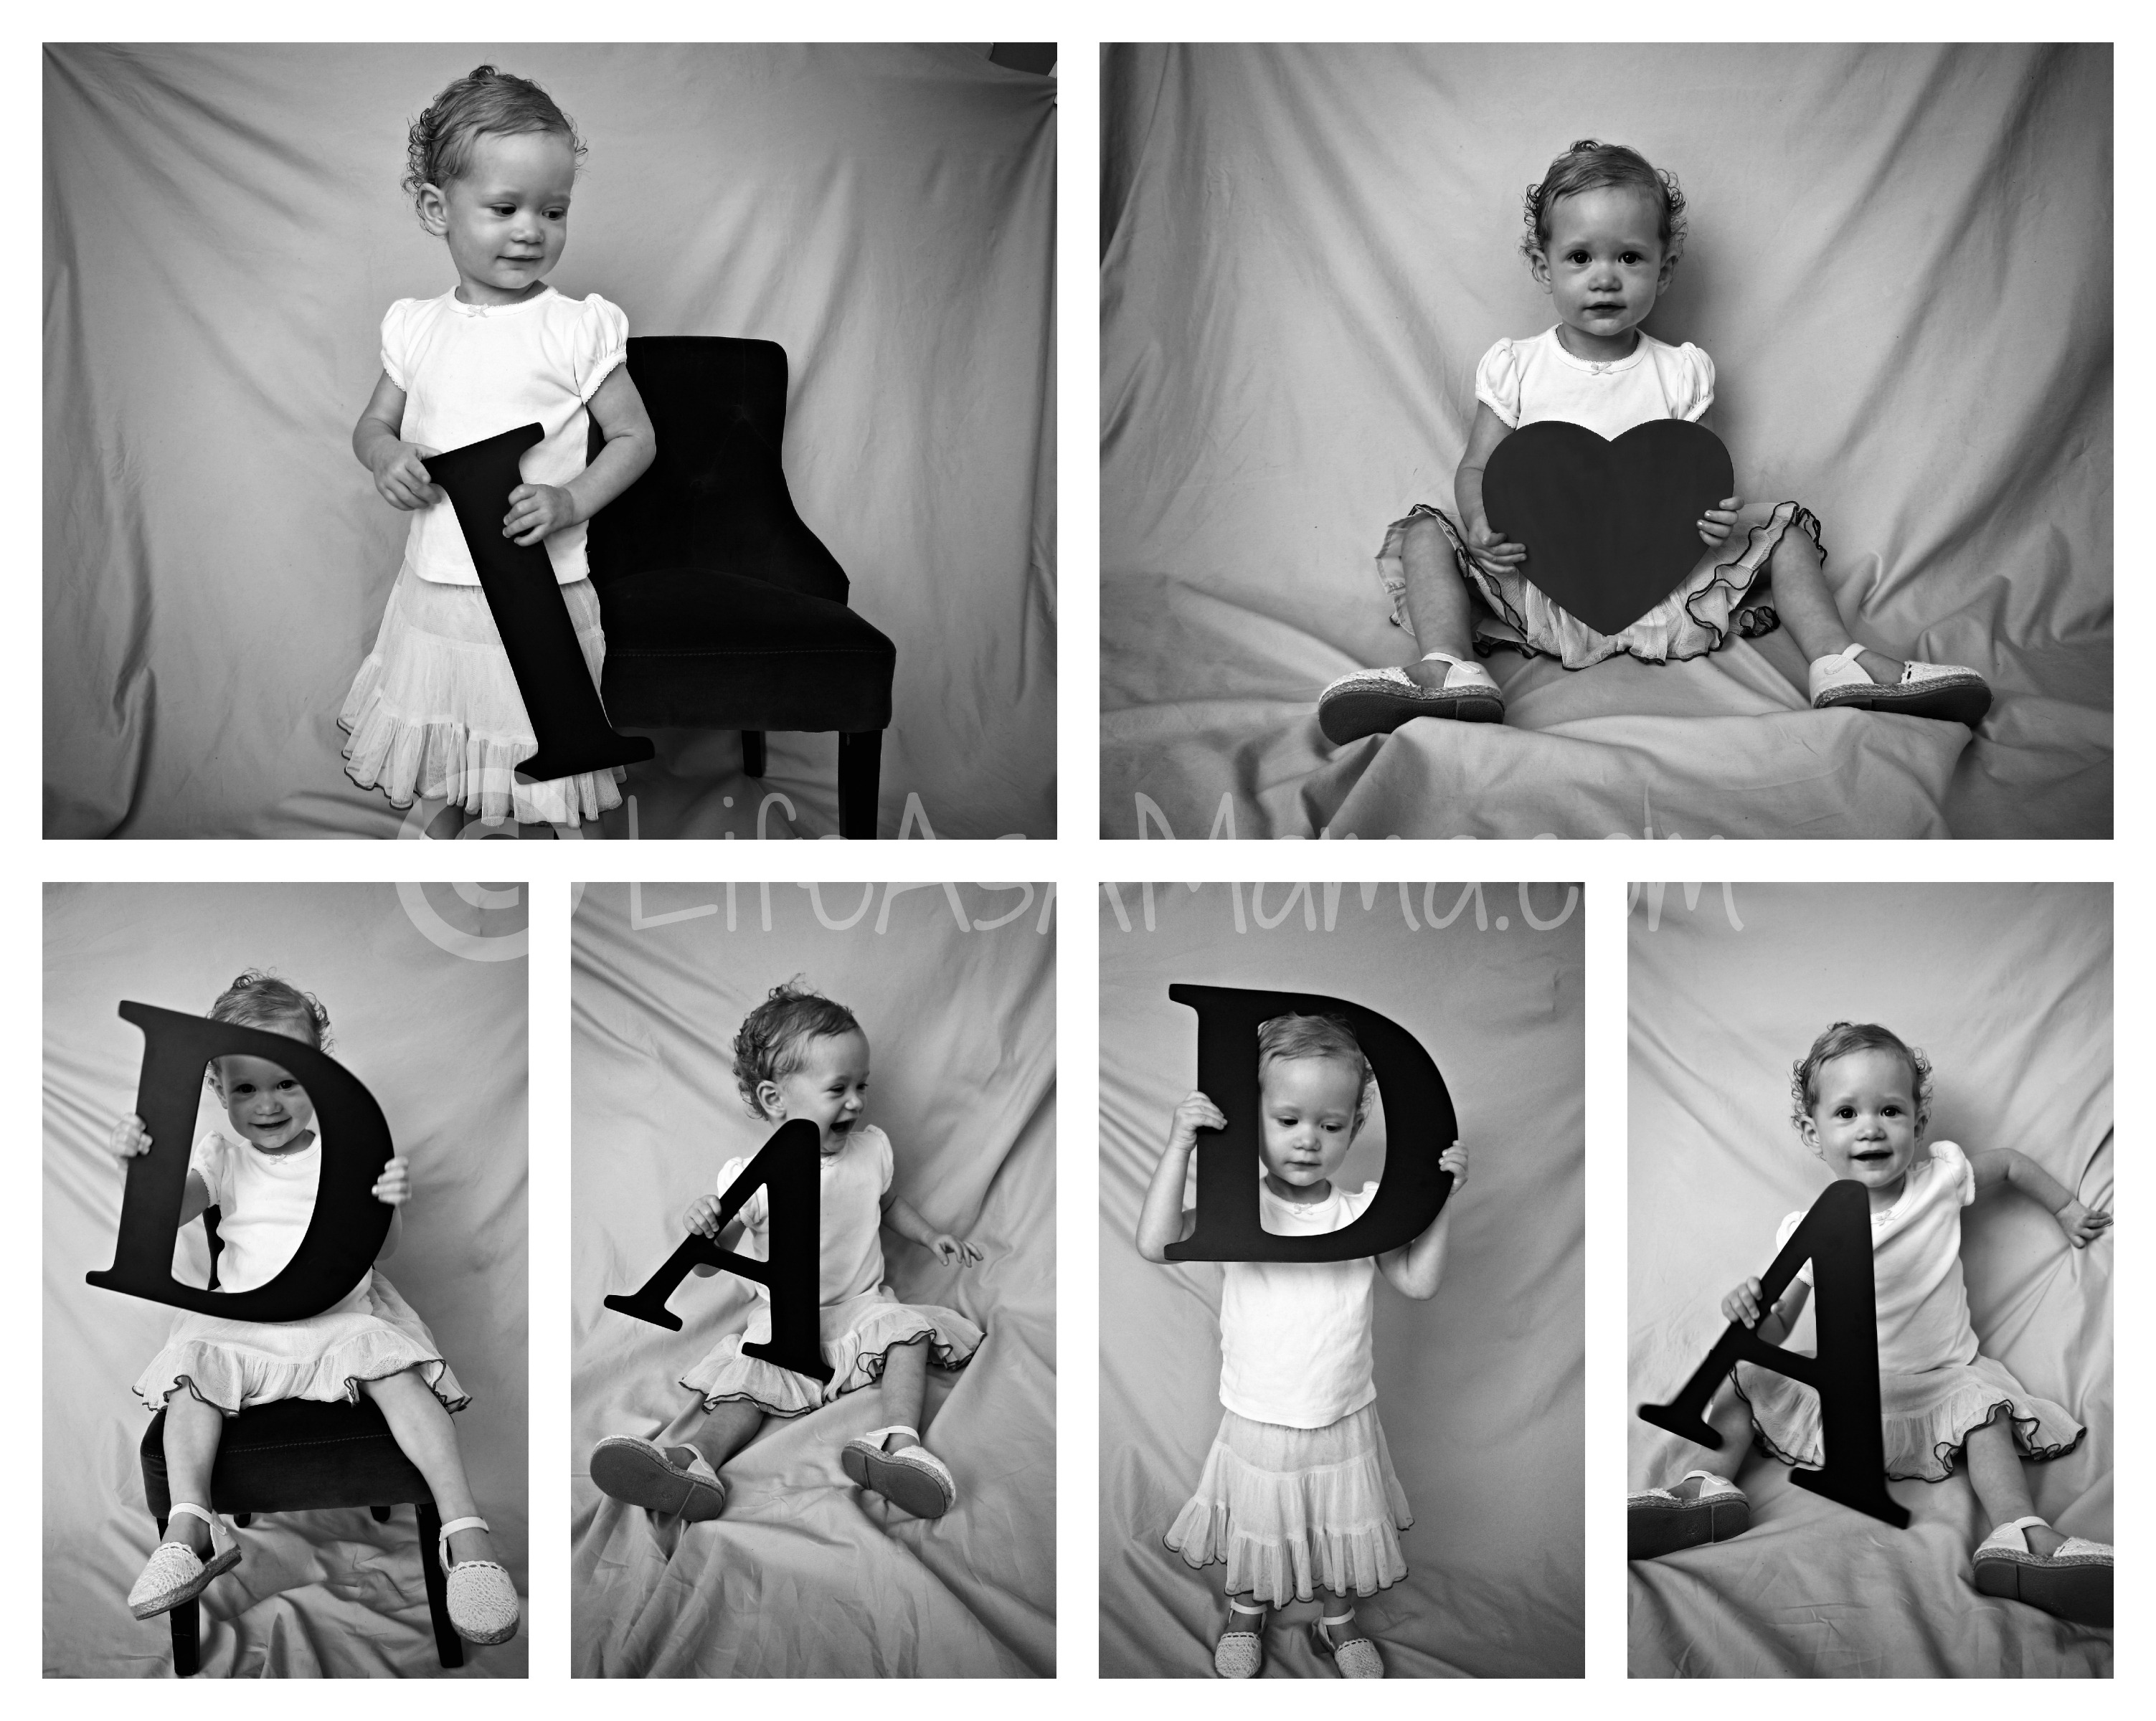
When the kids have had a birthday, or we need to thank friends and family for Christmas gifts (in other words, if I have to write a lot of notes all at once), this is the way I like to do it. Here are some examples of what I’ve done:

How To Make Cute, Personalized Thank You Notes by Life As A Mama

How To Make Cute, Personalized Thank You Notes by Life As A Mama

How To Make Cute, Personalized Thank You Notes by Life As A Mama

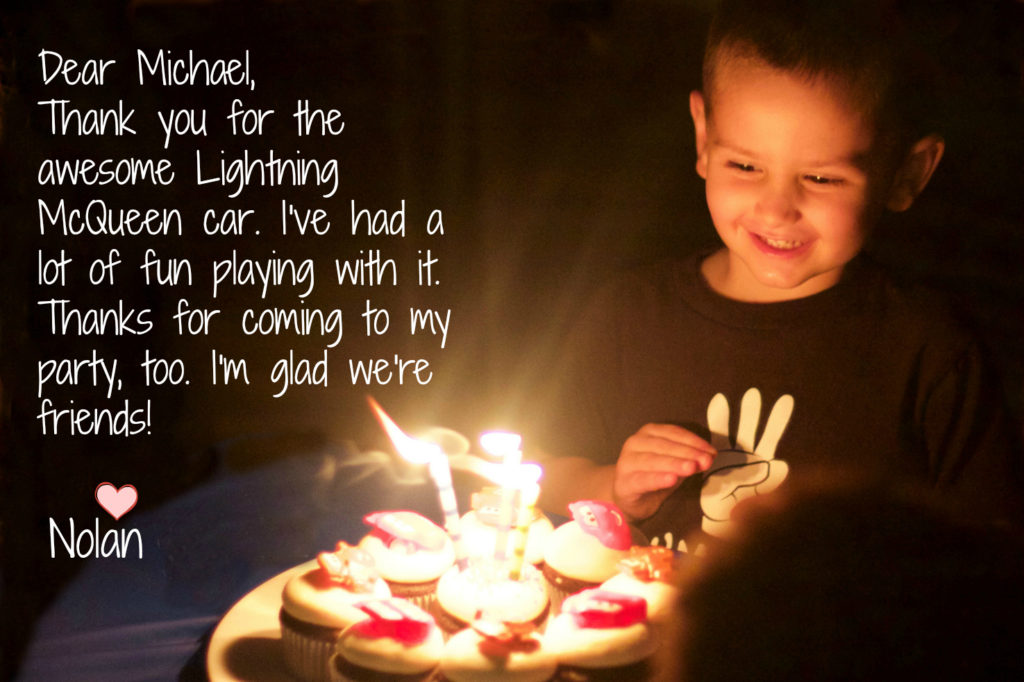
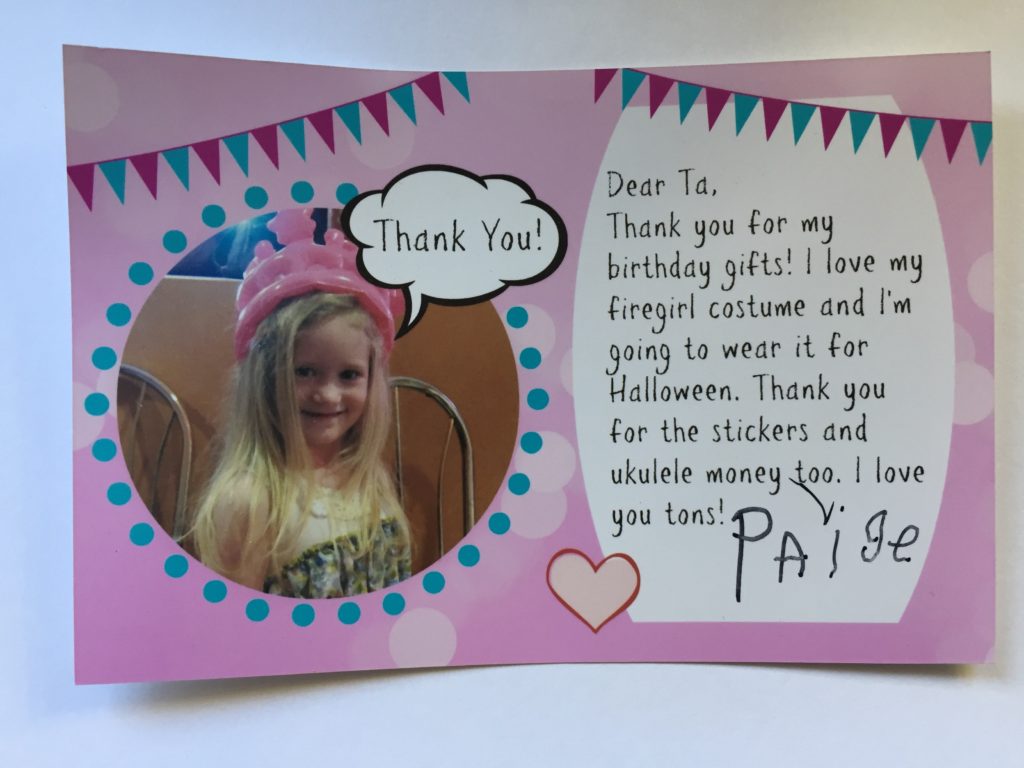
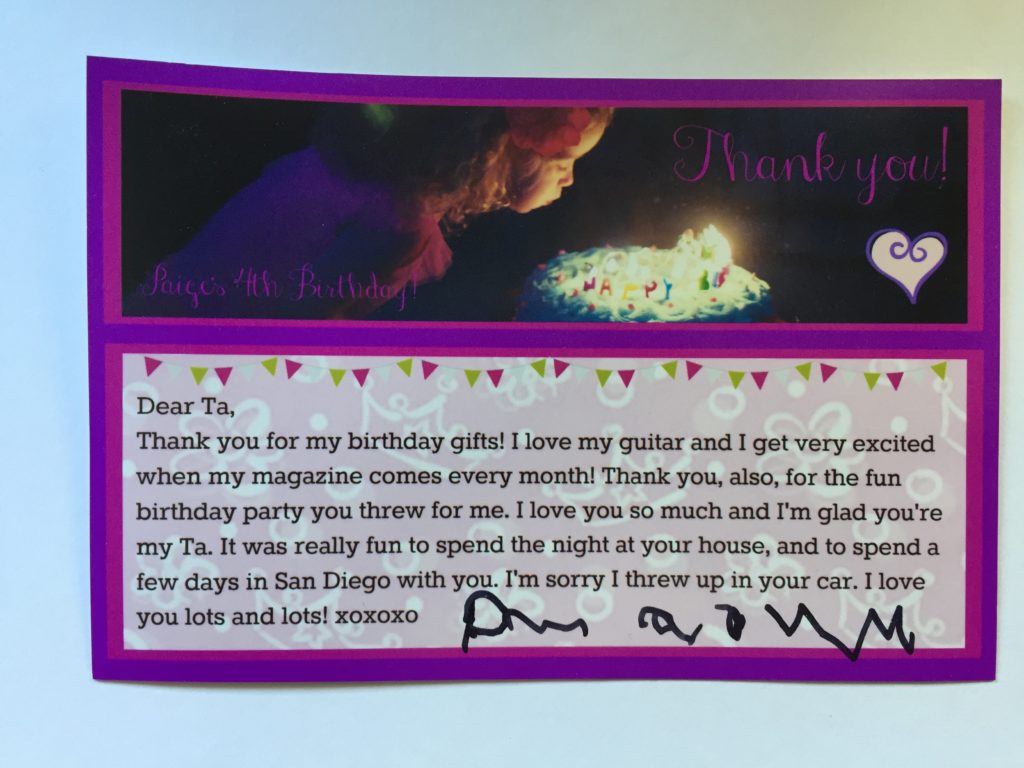
I’ve had several friends ask, “How did you do that?” so this is for you, dear friends!

First I make sure I sort through my photos from the birthday party or Christmas that requires thank you notes. I try to find a photo that has negative (empty) space where the message can be written, or, if that’s not available, I look for a cute photo of the birthday kid that I can use on an area of the card. I save the photo in a place where I can easily find it (I usually use my desktop). Then I create my card with PicMonkey, my favorite online editing, free (unless you decide to pay $33 per year for their premium plan, PicMonkey Royale, which I’ve found very useful at times) software. I’m not a graphic designer. PicMonkey is super easy to use and you can create anything you want with it. I’ve made Christmas cards, invitations, edited photos, etc.

This may seem like a lot of work but, once you get familiar with PicMonkey and your card is created, it takes about a minute to type and save each card.

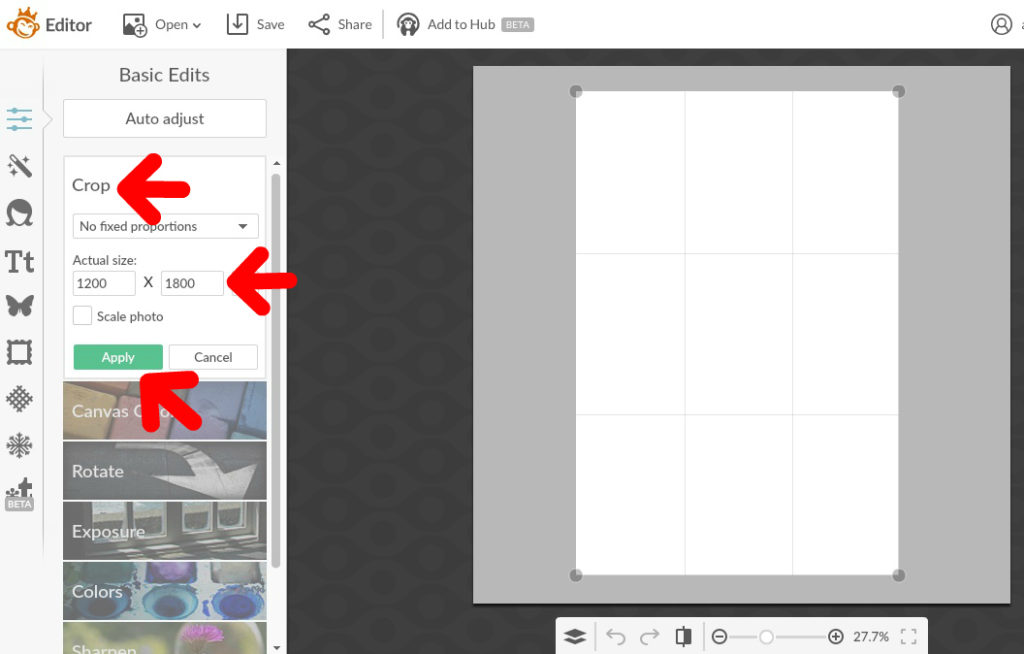
After picking my digital photo, I go to PicMonkey and click on “Design” at the top of the window. I’m then taken to a window with a blank white canvas on it. On the left side, I click on “Crop” then, because I print my thank you notes as 4″x6″, I change the size of the photo to 1200×1800. (This means 1200×1800 pixels per inch. If that doesn’t make sense to you, don’t worry about it. Just know that these dimensions will give you a nice looking 4×6 photo.) If you prefer a horizontal thank you note, make it 1800×1200. Then click the green “Apply” button.

How To Make Cute, Personalized Thank You Notes by Life As A Mama

How To Make Cute, Personalized Thank You Notes by Life As A Mama

After your thank you note is the size you want it to be, you can change the color of the background if you want to. Click on “Canvas Color” right below crop and pick your color! Since the thank you notes I need to write are for Christmas, I’m making the background red. Don’t forget to click “Apply.” I’ll add embellishments later.

How To Make Cute, Personalized Thank You Notes by Life As A Mama

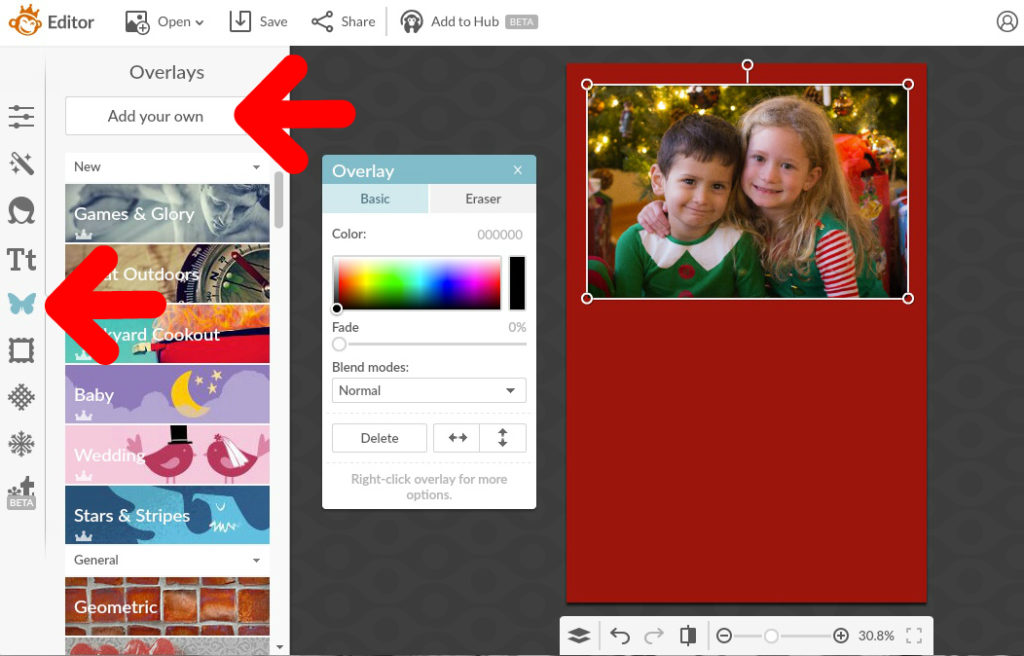
Now it’s time to add the photo! Click on the butterfly on the left side of the screen. This will take you to the overlays. At the top of the bar on the left, click on “Add your own.” A window will open up. Find your photo (mine was on my desktop) and click “Open” and your photo will magically appear on the thank you note you’re creating! Move it to where you want it by clicking and dragging. If it needs to be resized, just grab a corner or edge with your mouse and change the size as needed.

How To Make Cute, Personalized Thank You Notes by Life As A Mama

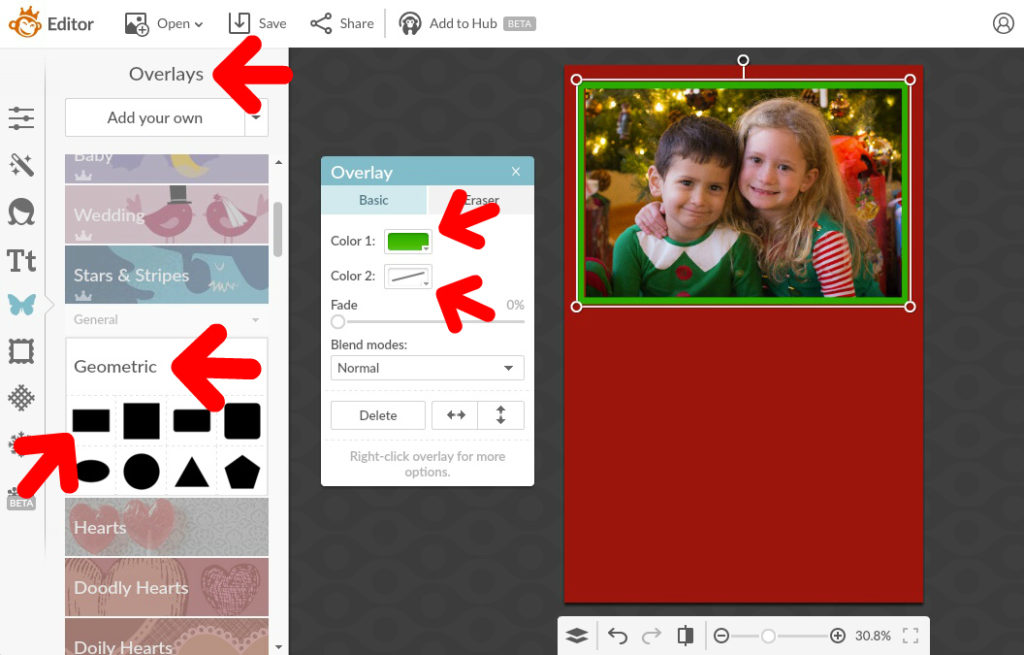
I wanted to give my photo a more finished look, so I decided to add a frame to it. To do this, while in “Overlays,” I scrolled down, on the left side, to “Geometric.” I clicked on the rectangle, changed color 1 to green and color 2 to transparent, and had my frame! Then, using my mouse, I changed the size of the rectangle to match my photo, moved it into place with my mouse, and my photo was framed.

How To Make Cute, Personalized Thank You Notes by Life As A Mama

Next I wanted to add some pretty embellishments to my thank you note. I thought some faded snowflakes around the edges would look nice and wouldn’t distract from the text that I would add later. I clicked on the snowflake icon on the far left towards the bottom. *This is where PicMonkey stashed the holiday stuff. These items can also be found in the Overlays (butterfly icon) section.  Sorry…sidetracked. Back to my card design.* Then I clicked on “Winterland” on the top on the left under “Themes.” About half way down on the left, I clicked on “Flakery.” Hello snowflakes! I clicked on them to add a whole bunch to my page, then moved them to the edges of my card. Using my mouse and holding the mouse button on the little circle at the top of each snowflake, I was able to tilt them to different angles and I resized them to make some smaller so they wouldn’t all look the same. To lighten the snowflakes, I slid the “Fade” slider to 80% for each snowflake. I added more snowflakes as needed.

How To Make Cute, Personalized Thank You Notes by Life As A Mama

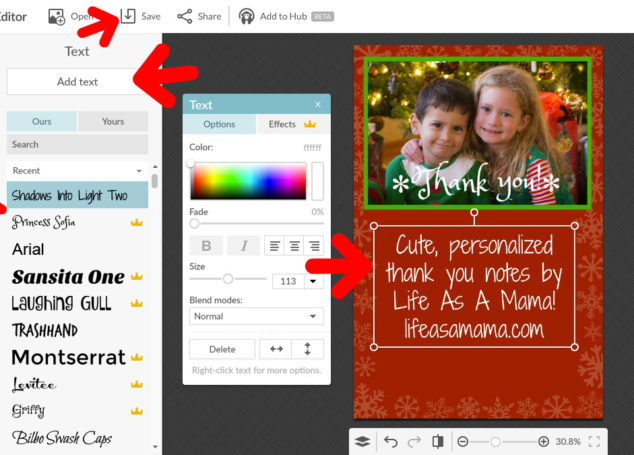
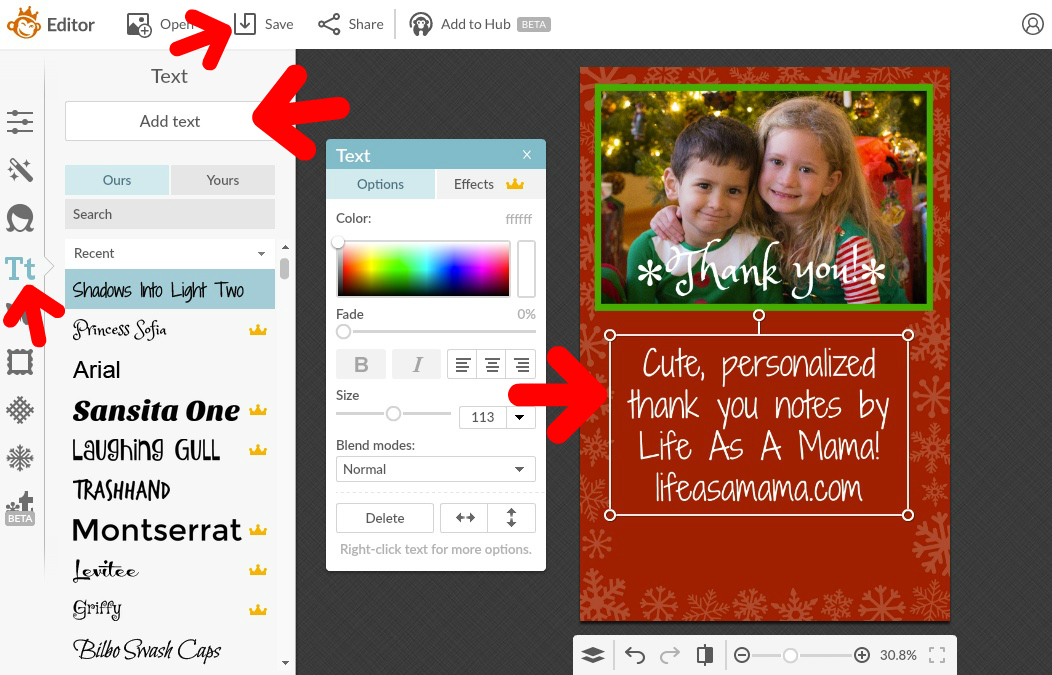
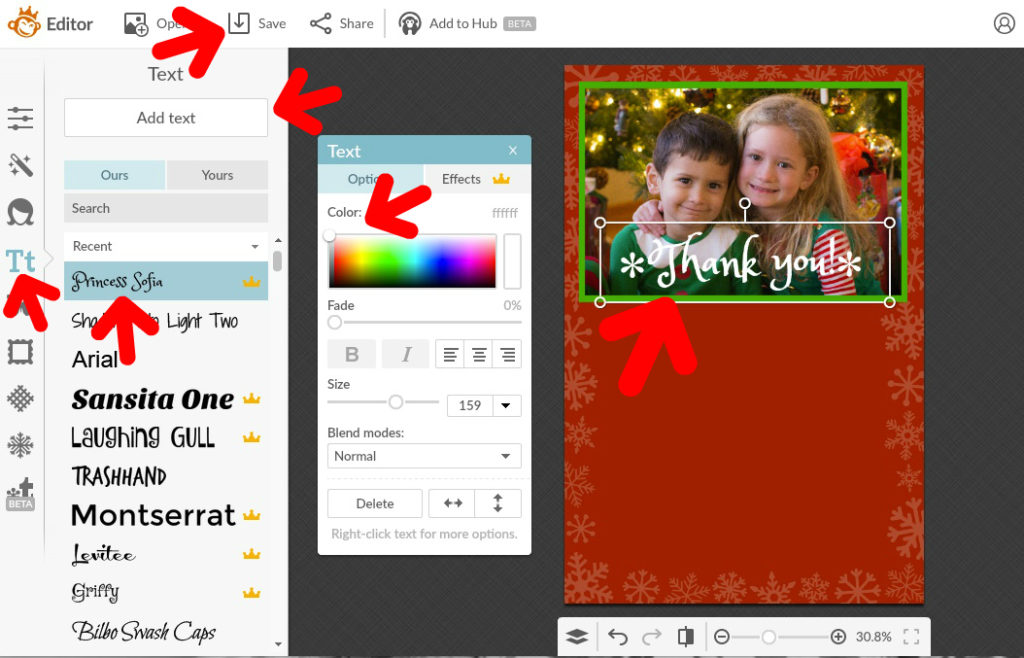
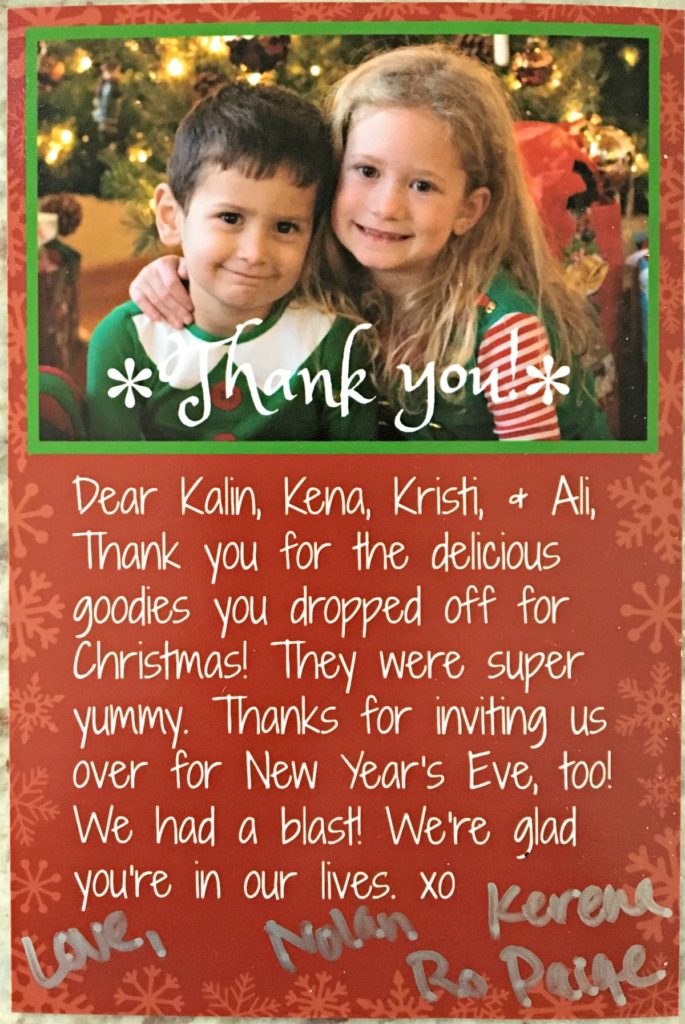
Then it was time to add text. I wanted to write “Thank you!” across the photo. So on the far left side, I clicked on the button that says Tt. I clicked “Add text,” wrote “Thank you!” in the text box that popped on the screen, changed it to white, and moved it into place. Then I changed it to the font I wanted and enlarged it a bit. And my blank card was done! This was the blank canvas upon which all of the thank you notes would be written. I saved this to my computer’s desktop in a folder called “Thank You Notes” and could then close the window (big X in the top right corner) because I was done with the design part of the process!

How To Make Cute, Personalized Thank You Notes by Life As A Mama

How To Make Cute, Personalized Thank You Notes by Life As A Mama

How To Make Cute, Personalized Thank You Notes by Life As A Mama

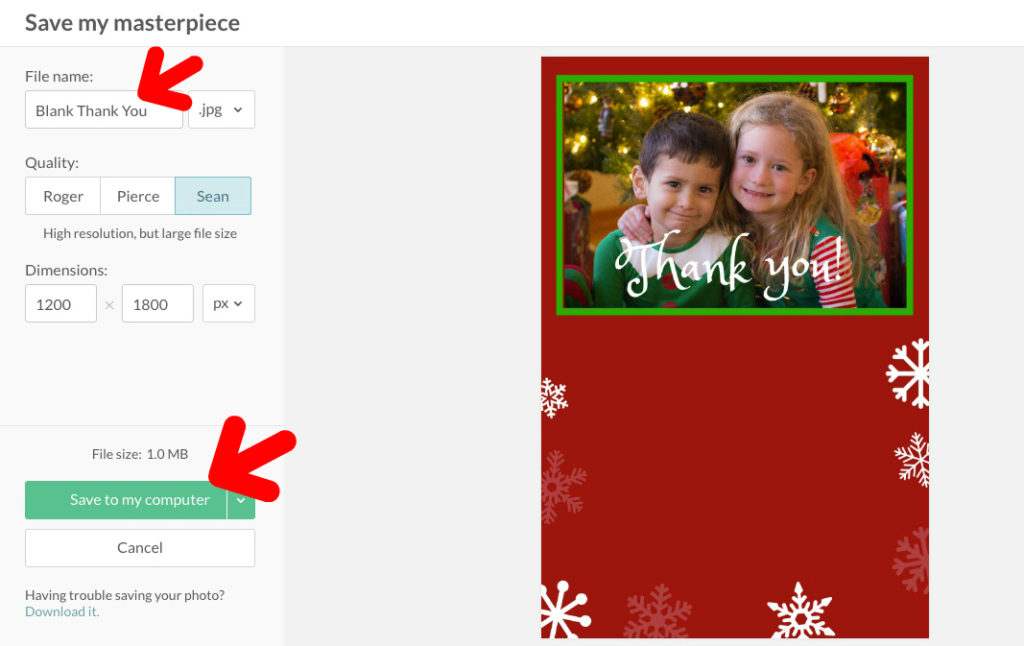
To create individual thank you notes, I went back to PicMonkey and clicked on “Edit” at the top of the window. I found and opened my blank card. I went back to the text (Tt) section, clicked on “Add text” and wrote a thank you note on the red area of my card. Then I saved it and named it according to who it was for. After saving, I didn’t close the card. I changed the text for the next thank you note recipient, and saved it again under their name. I continued this process until all of my thank you notes were written. They were all saved in the “Thank You Notes” folder on the desktop of my computer.

How To Make Cute, Personalized Thank You Notes by Life As A Mama

How To Make Cute, Personalized Thank You Notes by Life As A Mama

How To Make Cute, Personalized Thank You Notes by Life As A Mama

I then uploaded the completed cards to the Costco Photo Center online, ordered them printed as 4×6 with luster finish, and they were ready an hour later! I had the kiddos sign them with a silver sharpie and mailed them off to their intended recipients.

How To Make Cute, Personalized Thank You Notes by Life As A Mama

How To Make Cute, Personalized Thank You Notes by Life As A Mama

I ordered these envelopes for mailing the cards.

I get a lot of compliments on the thank you notes the kiddos send out. I hope you like them too!

~ This post may contain affiliate links. ~

No Comments
Food

Ice Cream Cone Cupcakes

Ice Cream Cone Cupcakes by Life As A Mama

I got some awesome Betty Crocker ice cream cone cupcake baking racks for Christmas and my daughter has been begging to use them!

Who doesn’t love an ice cream cone cupcake?! She wanted vanilla cupcakes with blue frosting and pink sprinkles. So that’s what she got!

My little bakers!

The baking racks were easy to use. We got regular ice cream cones and set each one in one of the little holes and set the racks on a baking sheet. (Please excuse the condition of my well-loved baking pan. It gets a lot of use.)

Ice Cream Cone Cupcakes by Life As A Mama

I wish I could share the recipe we used, but it’s the recipe that an Orange County cupcake business, Fairy Cakes Bakery, uses, and we’ve been sworn to secrecy. I’m sure any boxed mix would work and a quick search on Pinterest should provide an awesome frosting recipe.

My favorite dyes are the AmeriColor gels. For this frosting I added a squirt of sky blue. I used a piping bag fitted with a big round tip to apply the frosting.

We filled the ice cream cones a little too full with batter. I think next time I would leave around 3/4″ of space at the top. Several of the cupcakes overflowed. But they for us so we didn’t care! We had fun and the cupcakes were delicious!

~ This post contains affiliate links. ~

No Comments
Kids

Nolan Had The iPad

My kids LOVE to use our iPads. They play games, watch videos, and apparently make little videos of their own. My husband recently found this little goody on his. I have no idea what app he was using to do this. My silly boy will be 4 in a few months. Enjoy! (Click Continue Reading to see the video.)

No Comments
Gift

Handmade Christmas Gift – 2016 Edition

Every year, since my husband and I started dating wayyy back in the late 1990’s, we’ve made homemade Christmas gifts for our families. Our brand is K&R – our first initials. We’ve made soap, salad dressing, peanut butter, cookies, and probably a few other things I don’t remember.

This year we made cookie mix in a jar. I searched my favorite resource for all things awesome, Pinterest, and found this cookie mix recipe that’s made in pint-size jars. Perfect! I had to make a lot of them, so I wanted to avoid using big jars, if possible. According to the recipe, each jar makes 12 cookies. I did make one change, though. There is no salt in the recipe. I don’t believe in making anything without a little bit of salt, just enough to enhance the flavor, so I added 1/4 tsp to the mix. I’ve seen a lot of cookie mix jars in the stores lately for the holidays and most are unfortunate looking. They usually look like a jumbled up mess of ingredients that has been tossed around. My jars didn’t look jumbled up. Here’s why:

MUDDLER!

I use a muddler (like one you would use to pound the limes and mint together when making a Mojito) to press each layer down firmly in the jar. If there was room left at the top, I crammed in a few more chocolate chips to make everything fit tightly.

To finish and embellish the jars, I searched Google for clip art and used PicMonkey to add baking instructions. Each label was printed, cut out by hand, and run through my Xyron Creative Station to turn them into stickers that I stuck to each jar.

I wrapped the top of each jar with some red and white bakers twine, added a gift tag, and a little snowman ornament I made.

The gift tags were a last minute add-on. I happened to find these pads of festive card stock in the dollar section at my local Target (they were $3).

I cut out the tags (6 per sheet) with my gift tag maker, punched a hole in them, tied on a piece of bakers twine from my gigantic spool, and had whole lot of super cute, very inexpensive gift tags! I used a silver Sharpie to write names on the back of the tags.

I don’t know when I bought this twine, but it’s huge and I think it’ll last forever!

The snowman ornaments were inspired by a photo my sister sent to me. We like to have a craft on hand for my family to do at Christmas and this is what we chose for this year. We stayed busy with other things and didn’t end up doing the family craft. Anyway, I thought they were adorable, so I decided to add them to my cookie mix jars!

They were a little bit time consuming, but very easy to make.

I purchased 1 1/4″ wood blocks at my local craft store. They came in a pack of 8. When I realized I loved them and would need more, I found this pack of 50 on Amazon. I painted the blocks with 2 thin coats of acrylic white paint. My 6-year-old helped with this step. When the paint was dry, I sanded the edges and each side of the blocks to give them an aged look. The sanding is the part that was time consuming. Everything else was fast and easy. I used a black sharpie to draw on the eyes and mouth, and a small piece of orange felt and tacky glue for the nose. I purchased some small eyelet screws at my local home improvement store, and used a tiny drill bit to drill holes in the top of each block before inserting the eyelets. A piece of twine was added and the snowmen were finished!

2016 gifts…done! Now it’s time to plan for 2017. Do you make homemade gifts?

~ This post contains affiliate links. ~

No Comments
Milestones

A Few Years Later…

I’ve been neglecting this for too long. Time to dust off the blog and get back at it!

We’re a 2-kid family now! The Boy was born a little over 2 years ago. He’s awesome and keeps his sister on her toes. Kids are fun and life is good.

No Comments
DIY

Homemade Laundry Soap, Take 2

  • By
  • September 20, 2012

Last year I made my own laundry soap. It was the powdered kind. It worked well, but sometimes I had powder chunks left on my clothes after washing them. White chunks of powdery stuff on my black clothes wasn’t working for me. I tried dissolving it before using it, but that didn’t work so well either.

Today I made my own laundry soap again, but this time I made the liquid kind! Using my favorite resource for everything lately, Pinterest, I found a recipe that sounded good and easy.

The recipe I used is here and the original blog post I found is here.

In the recipe, she says to use any kind of bar soap you want. I used Ivory. She also separated it into 2 1-gallon bottles. I learned that it gets quite thick when cooled, so I divided it into 3 1-gallon bottles and added water to each until they were filled up. Then I shook them really well.

Here’s my finished product!

It was so easy to make! It took about a half hour, maybe a little less. And it was dirt cheap! I recommend letting it cool a bit before filling your bottles. The first load is in the laundry now. I love saving money!

No Comments
Sewing

Bandana Skirt

I love making stuff for my girl. While surfing through Pinterest, I found a pattern for a super cute skirt made out of a bandana. I headed straight to the store to find a bandana so I could make one for her! They were 2 for $2 or something ridiculously cheap like that at Wal-Mart. Score!

It was the easiest skirt ever to make. Basically I just folded it in half and cut it so I had 2 pieces. Then I sewed the sides together so I had a big bandana circle. Then I folded the top down twice, ironed it, and sewed along the bottom seam, leaving an opening for elastic. Then I inserted the elastic guided by a safety pin, sewed it together, sewed the hole where the elastic was inserted closed, and I was done!

Here’s a picture of The Girl modeling her new skirt.

Here’s a link to the instructions I found on Pinterest. The author of the instructions I found added extra fabric to the bottom of the skirt to make it longer. I didn’t do that. The Girl is still a shortie, so extra fabric would have made the skirt too long. Anyone can make this! If you want to learn to sew, it’s a super simple first project.


2 Comments
DIY

Happy Father’s Day

Oh my! Its been so long since I’ve blogged! I have lots of stuff to post and it’ll all be up soon. I promise. Well, maybe promise is too strong of a word to use. Anyway, I’ll work on it.

Tomorrow is Father’s Day and The Girl and I wanted to make something special for her dad. Normally she paints or colors something, but I felt like we needed to do something different. So after browsing online (mostly on my current obsession, Pinterest), I got inspired to make this:

I found the super cool big black letters and the heart at Michaels. They were already black, so there was no need to paint them, which made me VERY happy. While Baby Girl was napping I turned my living room into a photo studio in front of our big glass sliding door. The back drop is a light tan colored sheet, and the chair was a gift my aunt gave to Baby Girl before she was born. The outfit consists of hand-me-downs she had in her closet.

It was a bit of a fight to get photos of her not holding the letters the wrong way, running away, and pulling the back drop down, but after lots of bribery and begging, I was successful! I did some photo editing with my new favorite photo editing website, PicMonkey, and submitted it to Costco online to be printed. I picked it up, framed it, and it was ready for Baby Girl to give to her dada.

We got another gift for The Husband that he’ll get on Fathers Day, so we ended up giving the picture to him last night. We were soooooo excited about it, we just couldn’t wait! He loved it!

1 Comment